Building a Vocal Booth

Part I
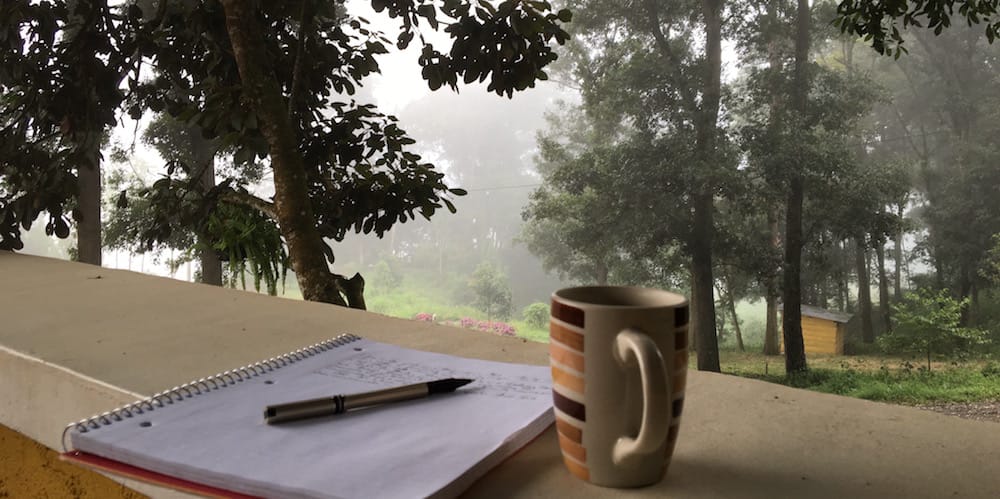
It’s really important to me that the quality of my work is the highest I can make it, and I’m proud of the quality of the meditations I provide for you to listen to.
But getting that level of quality is difficult. There should be zero background noise, no echo, and good vocal tonality.
You’d think, living away from the city, that I’d have an ideal environment for quiet recordings wouldn’t you?
Alas, this just isn’t true. The city of Calgary is nearby and the area we live in is designated as an airplane pilot training zone! That means we often have small airplanes flying around here and the low drone of their engines goes straight into the microphone.
On the higher end of the sound spectrum we have a wonderful selection of birds that begin chirping and singing away at the crack of dawn (currently at 5:20 am).
Never mind when the dogs get playing or barking at the horses or the horses run past. We also have cattle nearby and the neighbor has a donkey. None of them brays, moos, or barks on schedule so you can never tell when they’ll interrupt!
No, for a background-noise-free environment I decided I’d need to build one if I wanted to record at any time of day. In the past I was limited to late at night or early morning (winter is best for that).
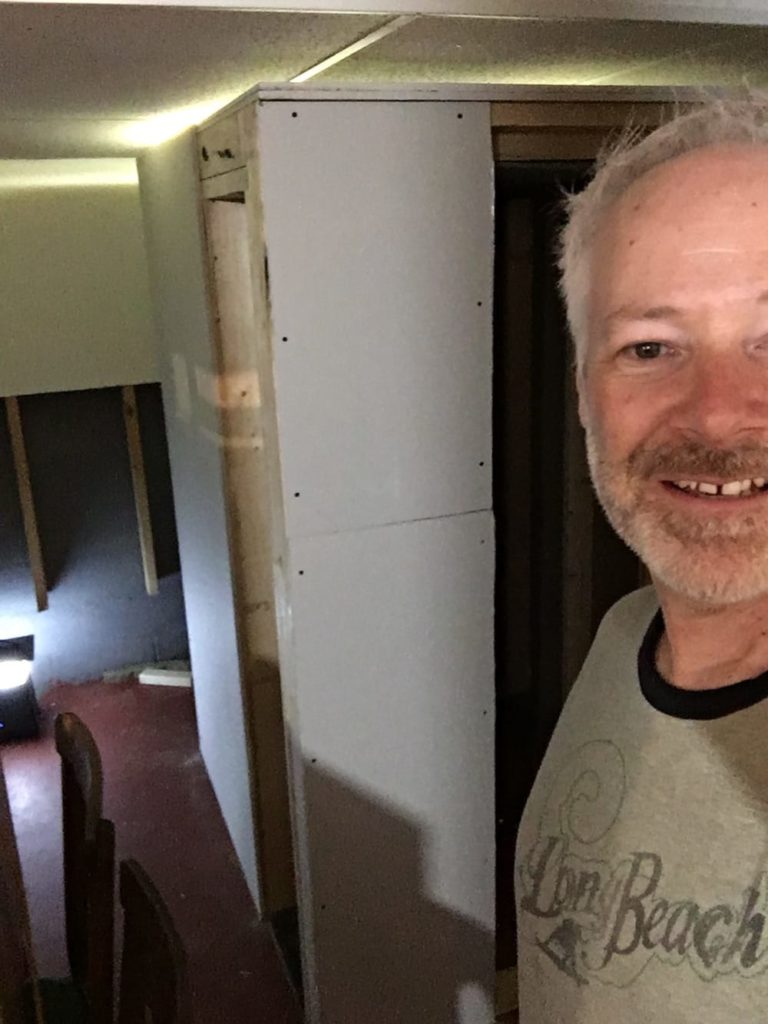
So here’s a few progress photos showing you how I’m building a vocal booth so that I can make the best experience I can for you who want to mediate on Christ.
Where to put it?
The first decision to make was where I was going to put the booth. Ultimately the cost would relate to it’s location and the amount of noise control I’d need.
There were 2 options, one in my cabin where I work, and one in the far corner of our basement.
The cabin was appealing because of the ease of use. I could record quickly any time I wanted, just by going inside and closing the door. But the downside is that it would take up a lot of space in an already small area plus I wasn’t sure I’d be able to completely block out the noises I was already dealing with in the cabin without a costly amount of soundproofing.
The second option, the basement, was appealing because it would be cheaper and was already a reasonably quiet area. This corner of our basement was just used for storage and once I found new places to store things it would be available.
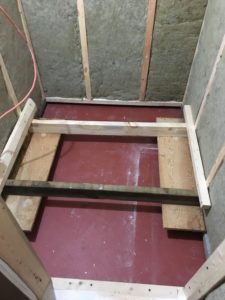
But it would not be easy to build in. It’s short: only 6′ 9″ which leaves little room for a floor and ceiling.
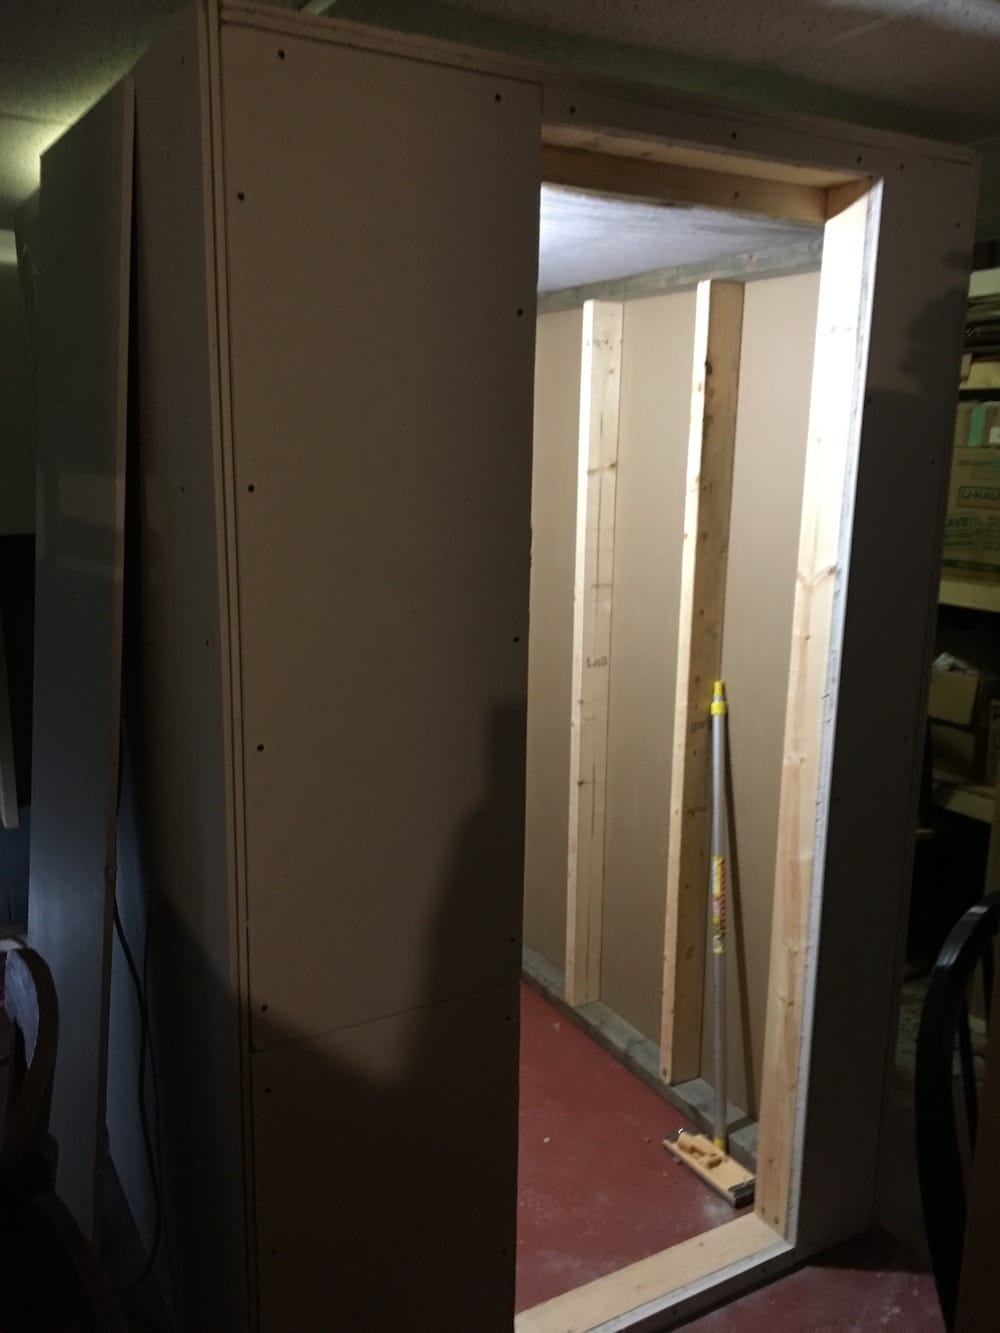
[content_band style=”color: #333;” bg_color=”#e4e1ce” border=”all” inner_container=”true”] Sidenote: Soundproof rooms mainly rely on the “room within a room” concept which means I’d build a fully independent room here without attaching it to the existing space. To minimize the transmission of noise through the floor, often an independent floor with noise reduction feet is built.[/content_band]I decided since the basement floor is concrete that I could skip an independent floor and that would save 4 inches. Then with just a 4.5 inch thick ceiling I’d have just enough room to stand inside without hitting my head. I needed a gap between the real ceiling and the vocal booth ceiling because contact between the two would allow sound to leak through.
Design
There are many options for building vocal booths, but I wanted to create it as cheaply and quickly as possible.
As I researched I realized that drywall on the interior is a terrible option for a vocal booth because it echos so loudly causing you to have to dampen the echos with lots of noise absorption material, which is expensive.
I decided to insulate the walls with sound dampening insulation called “Roxul safe and sound” which is like fiberglass insulation but made from rock and intended to be used between bedrooms in a house to cut down noise rather than provide heat/cold insulation.
This is the same stuff I read people recommend adding to vocal booths to absorb echos and then it dawned on me… why not leave the interior unfinished, exposing the Roxul so that I didn’t need to do both. Plus, by stapling up a fabric cover I’d be able to finish the interior quickly and at the same time not cause echo.
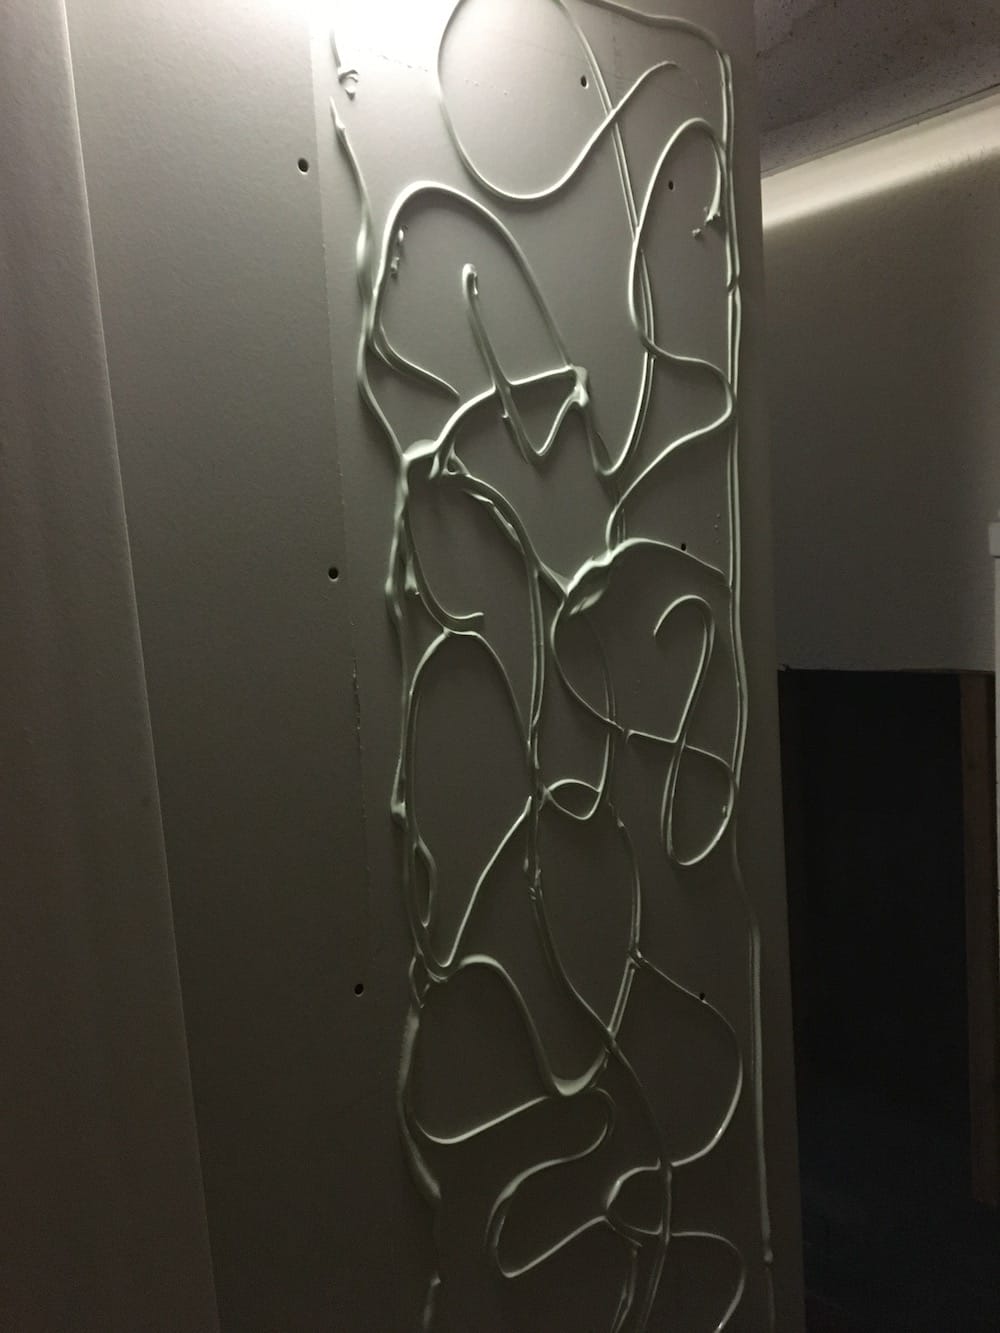
The exterior could be drywall, but because drywall transmits sound through it so easily I used a noiseproofing glue between 2 layers of drywall. This is the technique hotels use to drastically reduce noise between rooms.
Structure
I put myself through college by framing houses in the summer, so building with 2×4’s is second nature to me. This would be quick and easy for me to design and build.
Since Roxul insulation is intended to go between 2×4 studs it matched perfectly.

The only downside is that 2×4’s tend to transmit vibrations straight through the wall. Sound hits the outside drywall, the vibrations go through the studs, and then cause the inside drywall to vibrate, allowing the sound through. By not adding drywall to the interior and using double layer drywall on the exterior with noiseproofing glue I am hoping to avoid the typical problems with 2×4 construction.
Moveable
I designed it to be moveable too. I’m not sure how realistic this is, but in theory I’ll be able to unscrew the walls and ceiling from each other and carry each piece to a new location. In reality, I’m not sure it will be that easy – but that’s a future bridge to cross!
Next Steps
I’ll add part 2 when I’ve completed it, but the next steps are to complete the door, add the insulation, and cover it with the fabric. Then, I’ll have to begin testing to see if I’ve got a decently quiet space.
Finally, I’m going to move it right into the corner of the room. To add all the exterior soundproofing I needed access to all sides, but I don’t want to leave it in the center of the room so I’m planning to jack it up 1/2 an inch and then slide it into the corner. We will see how easy/difficult that is.
[clear]Part II
In went the insulation. As I said up above, I decided to use Roxul “Safe and Sound” insulation, because this is exactly what it’s for.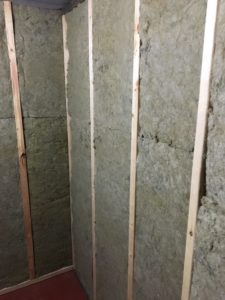
And then after that, I wanted to move it so that I wouldn’t damage the landscaping cloth that I was going to use to cover the walls inside.
Moving it to the Room’s Corner
To move it, I lifted each corner up a couple inches with a crowbar then jammed a 2×4 cutoff underneath. That left zero clearance to the ceiling, but this was temporary.
I then screwed braces to the walls and inserted 2 pairs of casters underneath (that my father had built to move furniture on).
When I pulled out the 2×4 blocks it settled down enough that it no longer touched the ceiling.
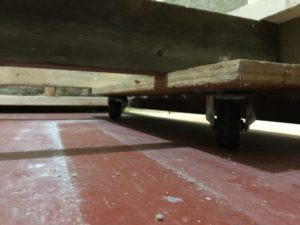
Once it was in the corner of the room, I set it down on top of some 3/4″ foam insulation I had already so that sound would be less likely to travel from the concrete to the 2×4 walls, and also to make sure that there weren’t cracks between the floor and walls that sound could seep through.
Door
The door was tricky because it has to seal well. If it doesn’t seal, then all the other noiseproofing is for naught.
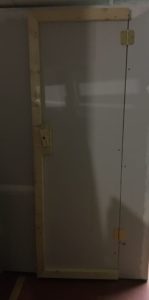
It’s built almost exactly like the walls. 2×4 frame, drywall (2 layers with noiseproofing glue), and insulation.
I figured I could cut off the edges of the 2×4 and then use the triangular pieces that came off as door stop molding so that when it closed tight it would be cradled in nicely. But that didn’t work.
The problem was the door is so thick that the 2×4 opposite the hinges would get stuck. That meant cutting the 2×4 diagonally lengthwise so that the entire surface the door’s edge was beveled. This allowed the door to close nicely.
I also added 2×3 on the outside of the door so that it would have one more place to seal.
Next problem was that my intention was to cover all the doorstops with weather stripping so that it would be totally airtight. But when I did that, the door couldn’t close any more!
So I pulled off the excess weatherstripping until I either get much thinner stuff or decide it’s unnecessary.
Actually, the door seals quite tight. [clear]
Interior Finishing
Lastly, I covered the interior with landscaping cloth (it’s cheap and wide) and laid some carpet on the floor.
I’ll probably add a shelf in the future, to put my laptop and my notes on, but for now, I moved in the bare necessities and it’s ready to go!
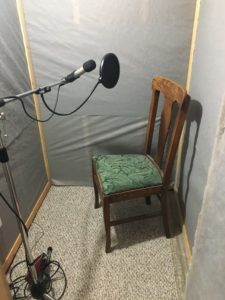
I’ve tested it already and it works great. So, in the future, when you listen to the meditations chances are they will have been recorded right here!


Wow. My son wanted his room sound proof for his gaming – lol – he bought these foam type things. Due to the fact we are losing the house – we had to take it down.
Nice know you do so much effort.
Haha, yeah that would be great (probably for you too) but it’s not as simple as it seems. I looked into those foam things and they are for a very specific purpose. I may need some yet. Praying for you Kim!
Hi Dean,
I think the quality is just fine. Keep up the good work!
Tim
Thanks Tim I’m grateful you feel that way. I’m excited about the booth because it will enable me to record at any time of the day, especially difficult in summer months.
Super cool! Egg cartons work well for sound insulation! 🙂 God bless you!
Haha, thanks! I may have to try that if the sound isn’t right at first
Thank you so much Dean for all you do to make our experience of mediating on Christ so meaningful & powerful; and for sharing this process of creating a vocal booth.
If someone were to want to make a one time love offering to support your ministry, how would they go about it?
Thanks again for sharing your passion for Christ with us through this wonderful resource “Meditate on Christ”
Blessings, Marg
Oh thank you so much Marg! You are such an encouragement to me. Probably the easiest way to send a donation would be for me to make a Paypal donate button. Because I’m not running as a charity I’ve not seriously considered that yet, but now I will. Thanks again!
I’ve now added a “donate” link to the footer menu of the site. It’s through PayPal. Any amount would be greatly appreciated! https://meditateonchrist.com/pricing/donate/
Thanks for sharing your building the sound booth project ! It was cool get to know more about you and your hearts desire to truly invest in the lives of your members through making improvements in our experiencing God through meditation. Well done!
Thanks for posting your thoughts Rhonda!
You are truly a blessing. May God continue to bless you and your ministry. Thank you for your obedience to Christ. It shows by your desire to do your best that yes, you do it for us listeners but first and foremost you do it for God. You truly are like David, a man after God’s heart.
Thank you so much! I’m trying my best 🙂
I thank God first for helping me to find you. It has made me sit still which I have struggled with. God is showing me things during my meditations. Thankyou for your desire to help people.❤
You’re so welcome, and thanks for letting me know how it’s going for you!
Thank you for all you do, helping me get closer to God
Diana
You’re welcome Diana!
We are working on plans new recording studios and recently talked to a studio design expert. One of the hardest things to do quietly is ventilation. Have you figured out how to do that? If not, he gave us some ideas I can pass along.
I’d love to hear them. I’m actually stalled out at this point – I was going to try some “mazes” of 2×4’s so that by the time the air got to the vent it would be a long way from the source. But I haven’t tested yet.
Knowing how much your Dad loved the challenges of creating and building things to enhance your family’s home experiences I know that he would be very proud of the thought and effort you have put into building your recording studio. And he would be even prouder of the purpose for it – to enhance the ministry into which God has led you. Thanks for your dedication to your calling.
Thanks so much! I appreciate that. I used some of his tools, actually, and thought of him when I did! Thanks for your support too 🙂
Clearly you do not suffer from claustrophobia! I found out that I do in the middle of an MRI recently, extremely unpleasant :o( Thank you for your dedication and hard work. I think you enjoyed the challenge and God had prepared you for it way ahead of time learning comstruction. Enjoy it and be blessed for being a blessing. Diane
Haha, true! I’ve had many MRI’s myself and I know what you mean. For me, my head was locked in place (because they were scanning my neck and chest) and so there was a time or two I felt claustrophobic! In later years, after I’d discovered meditation, I was much better off. Thanks Diane!
Great job, Dean! Thanks for all you have done to help bring us into the presence of our Father. I never meditated before meeting you. Awesome!❤️
Thanks Angela, I’m grateful I’ve been of service to you!
Thanks for your work on this
You’re welcome!